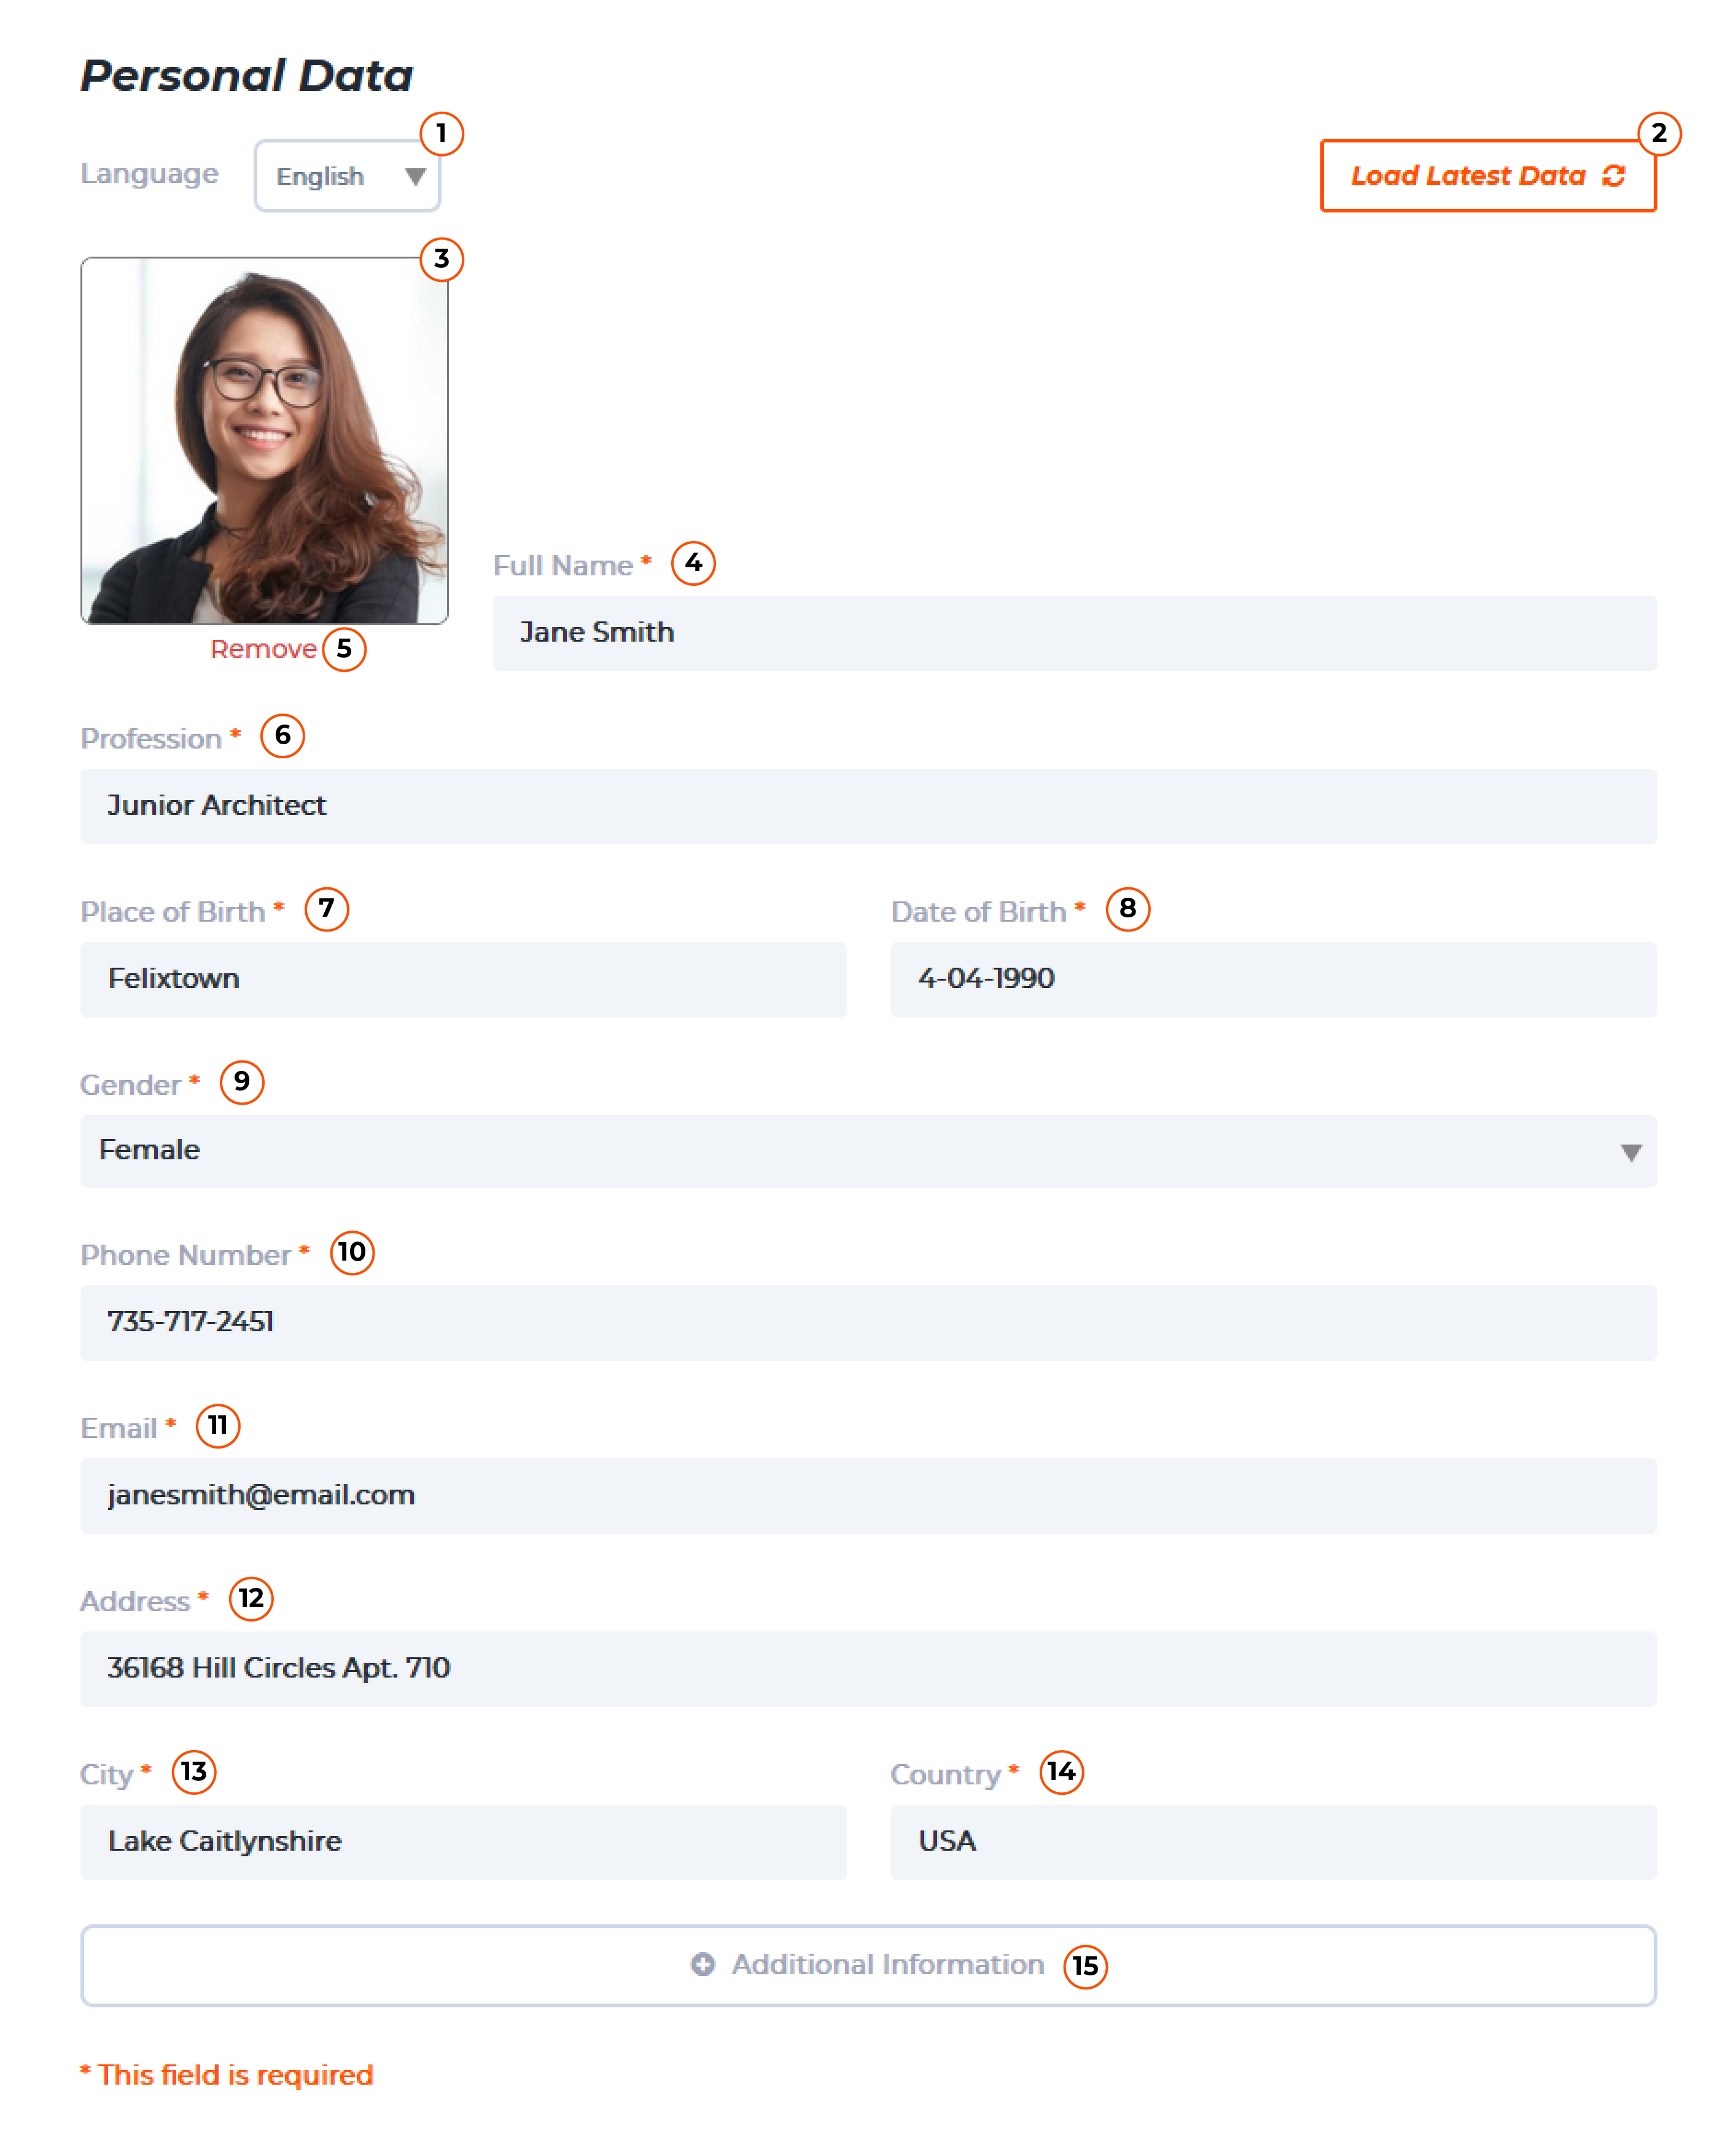
Choose A Language
You can choose a language you can use in your CV, there are two languages you can use, Indonesian and English.
You can choose a language you can use in your CV, there are two languages you can use, Indonesian and English.
Just upload your good and clear quality photo that is not more than 200kb.
If you want to replace your photo in CV, you just need to choose “delete”, then choose a photo you would like to use.
Write down your full name based on your legal identity card.
Write down where you are born based on your legal identity card.
Write down your date of birth based on your legal identity card.
Just choose your gender based on your legal identity card.
Just choose your religion based on your legal identity card.
Just choose your marital status based on your legal identity card.
Write down your active telephone number that’s available for recruiter to contact you.
Write down your active email address that’s available for recruiter to contact you.
Write down your current address
Write down what city you’re living in now.
Write down the country you are from based on your legal identity card.
Click the additional information to add another important data that you would like to inform in your CV.
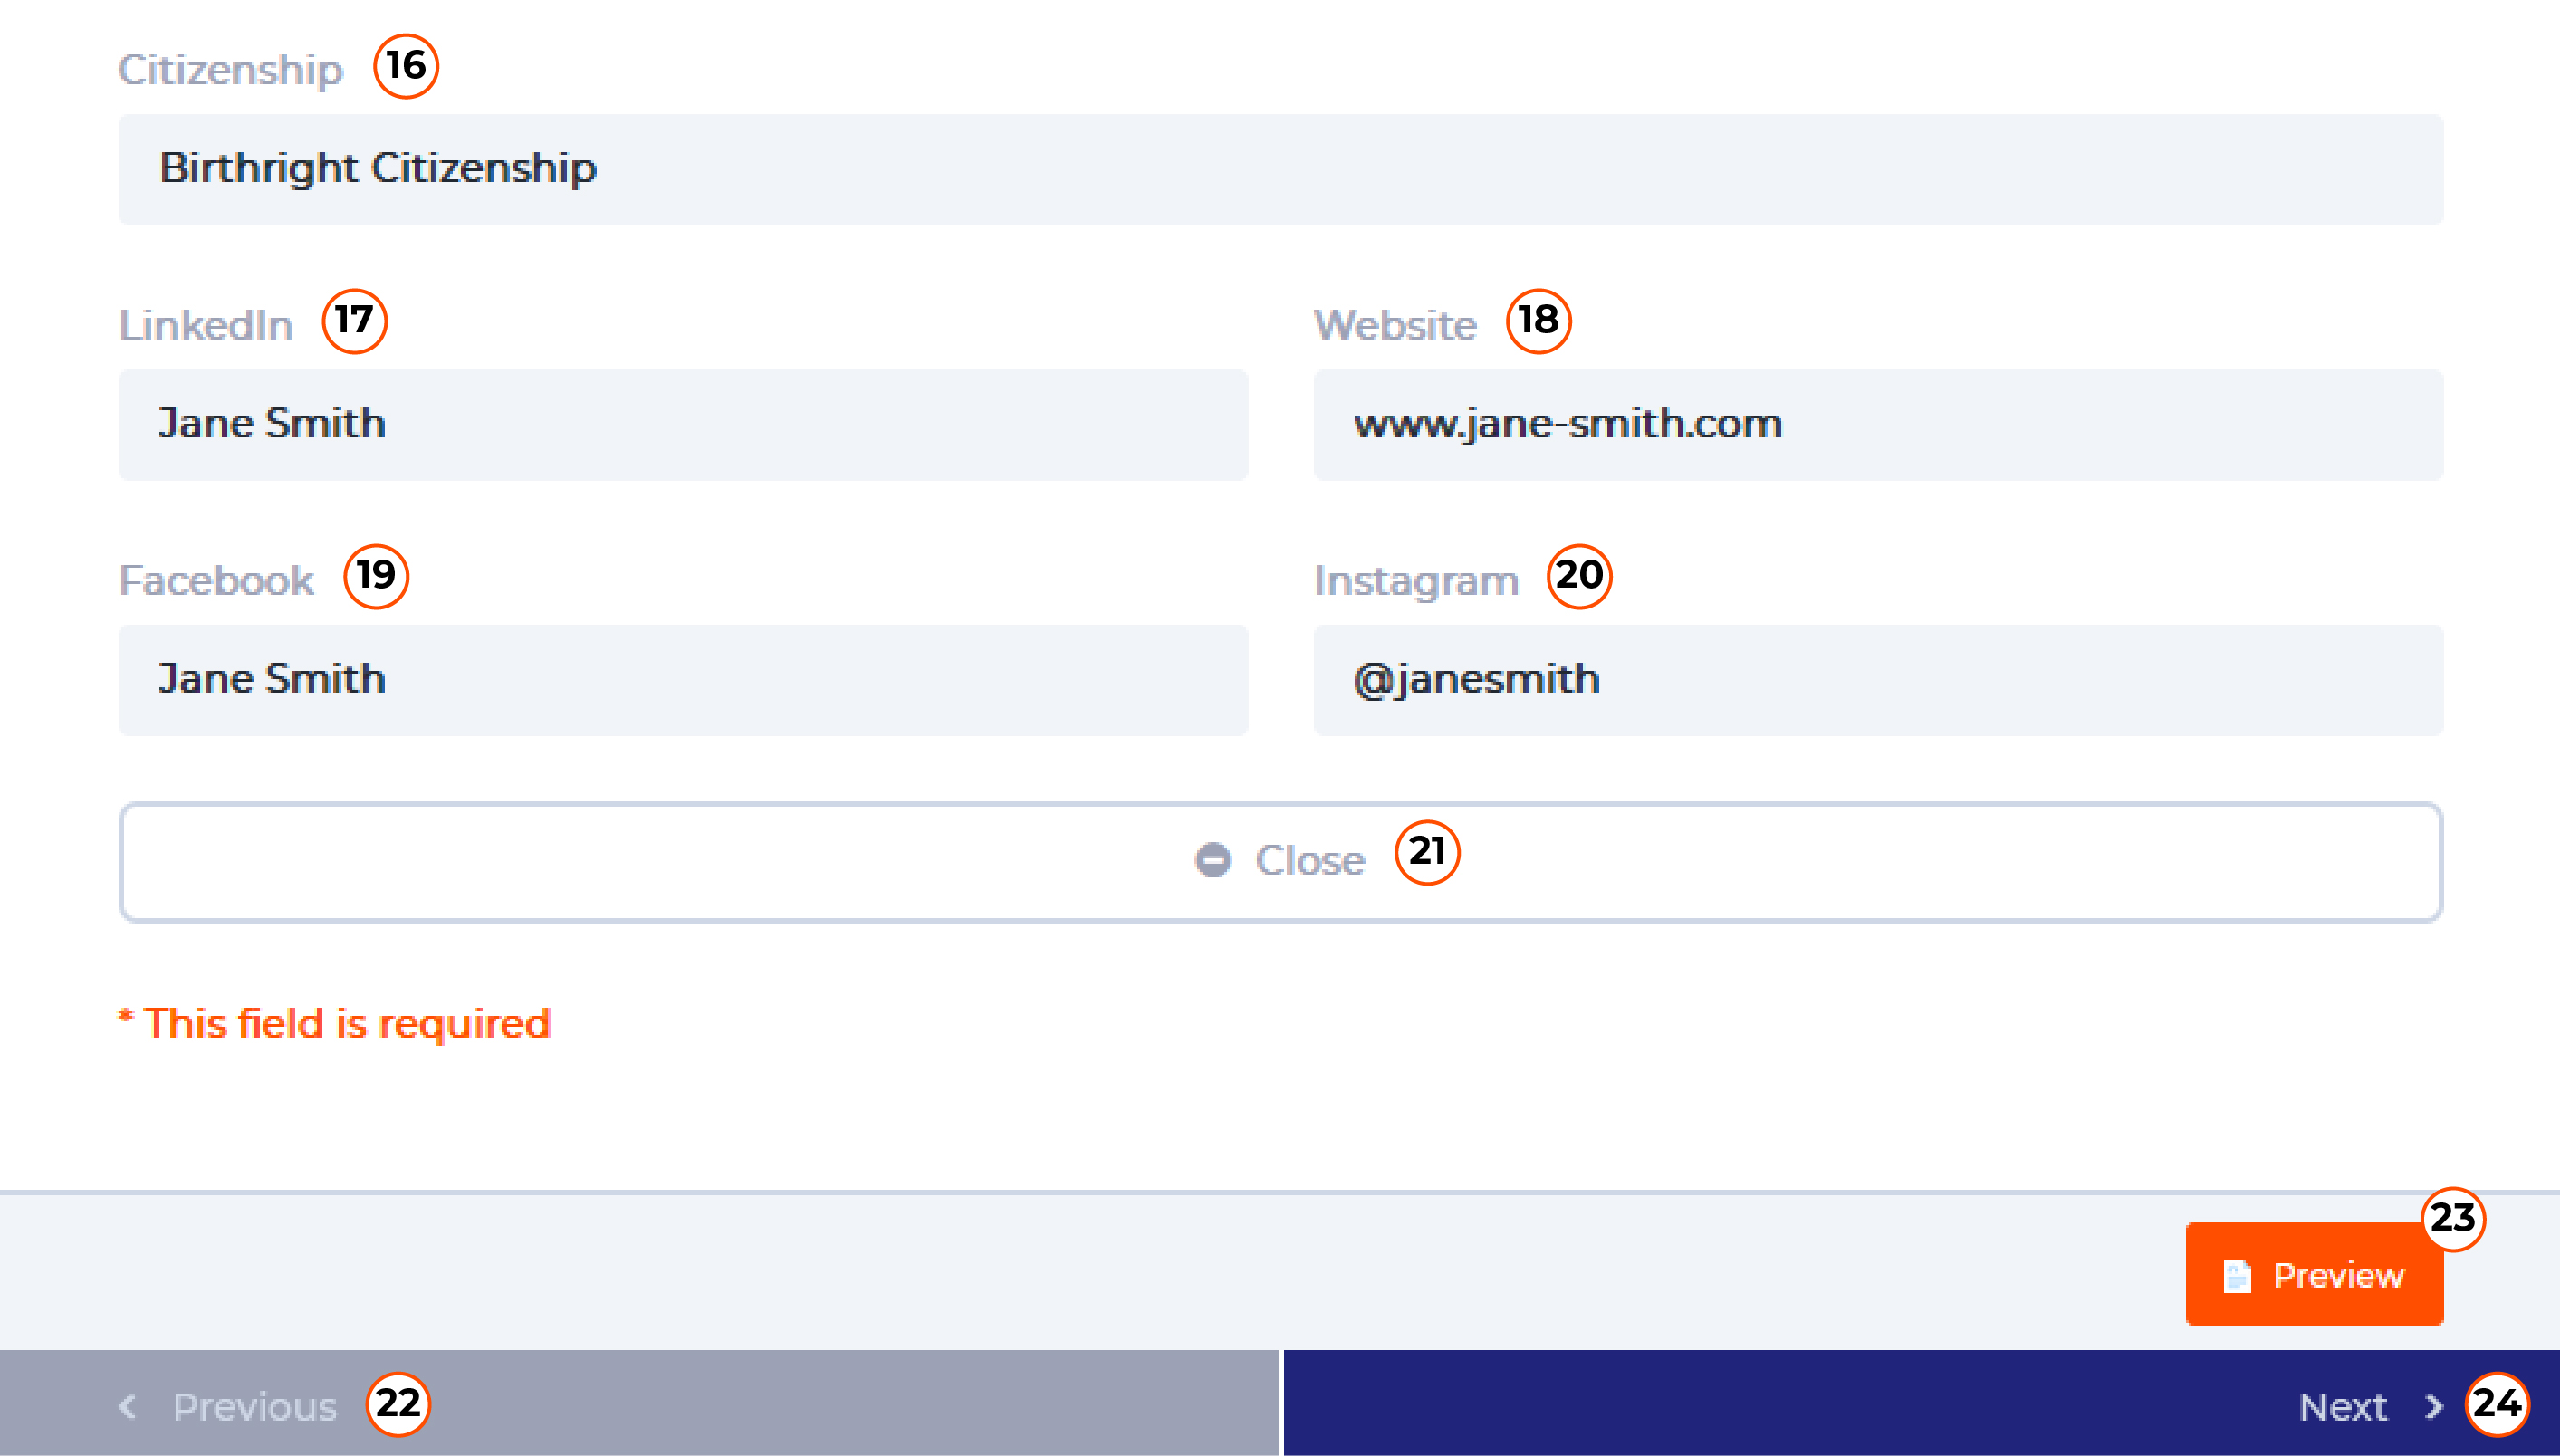
Write down your citizenship based on your legal identity card.
If you have a LinkedIn account, you can write it down here.
If you have a website, you can write it down here.
If you have a Facebook account, you can write it down here.
If you have an Instagram account, you can write it down here.
After you write down all the important personal data, then click “closed” then click “next” below.
You can see the preview of your CV that you’ve been filled in through “Preview” button.
After you fill in the data, you can click a Next button that’s going to the next form step for you to fill in.
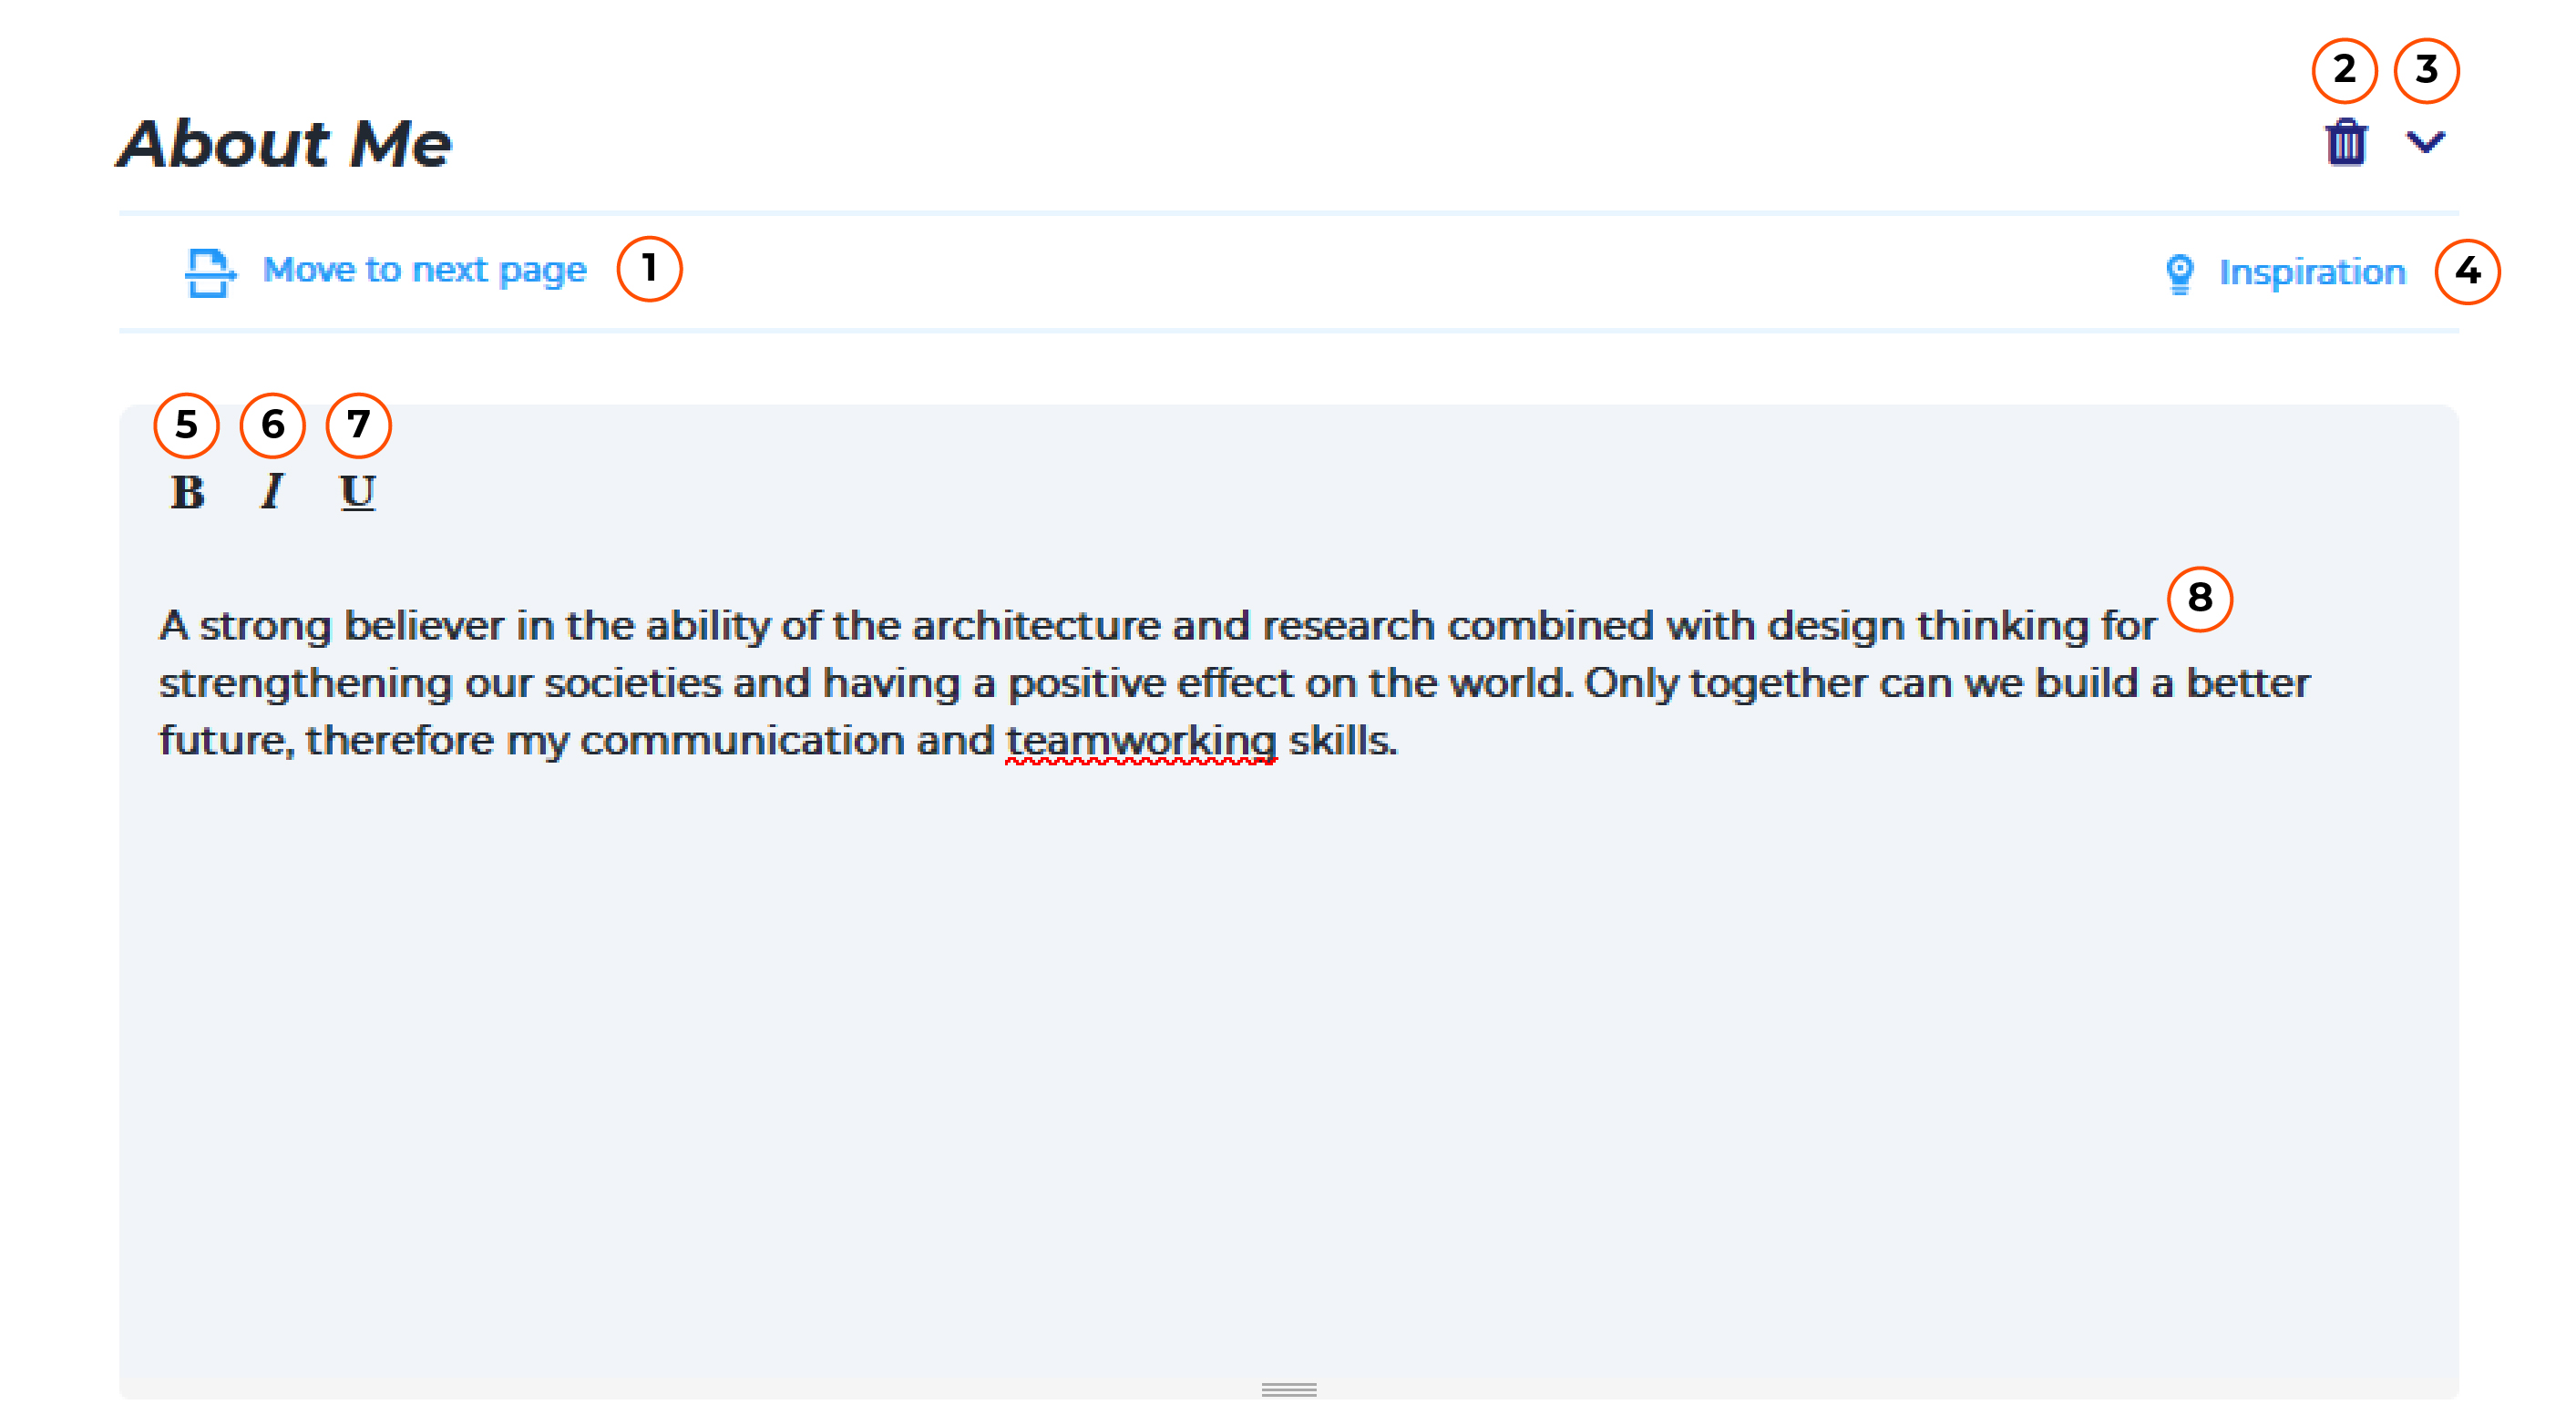
You can click this icon if you don’t want to write down “About Me” in your CV. You can go back to “About Me” form through a button “Show Deleted Form” below.
Just click the icon, if you want to put the position “About Me” in the below section.
Just click the icon, if you want to put the position “About Me” in the next page in your CV.
Just click the icon to see some inspiration that you can use in writing down the form “About Me” section.
Just click the icon if you want your letter to become bold.
Just click the icon if you want your letter to become oblique.
Just click the icon if you want to have an underline in a letter.
You can write down anything relevant about yourself and the job you apply to In here. Write down in short and concise so the recruiter is eager to hire you.
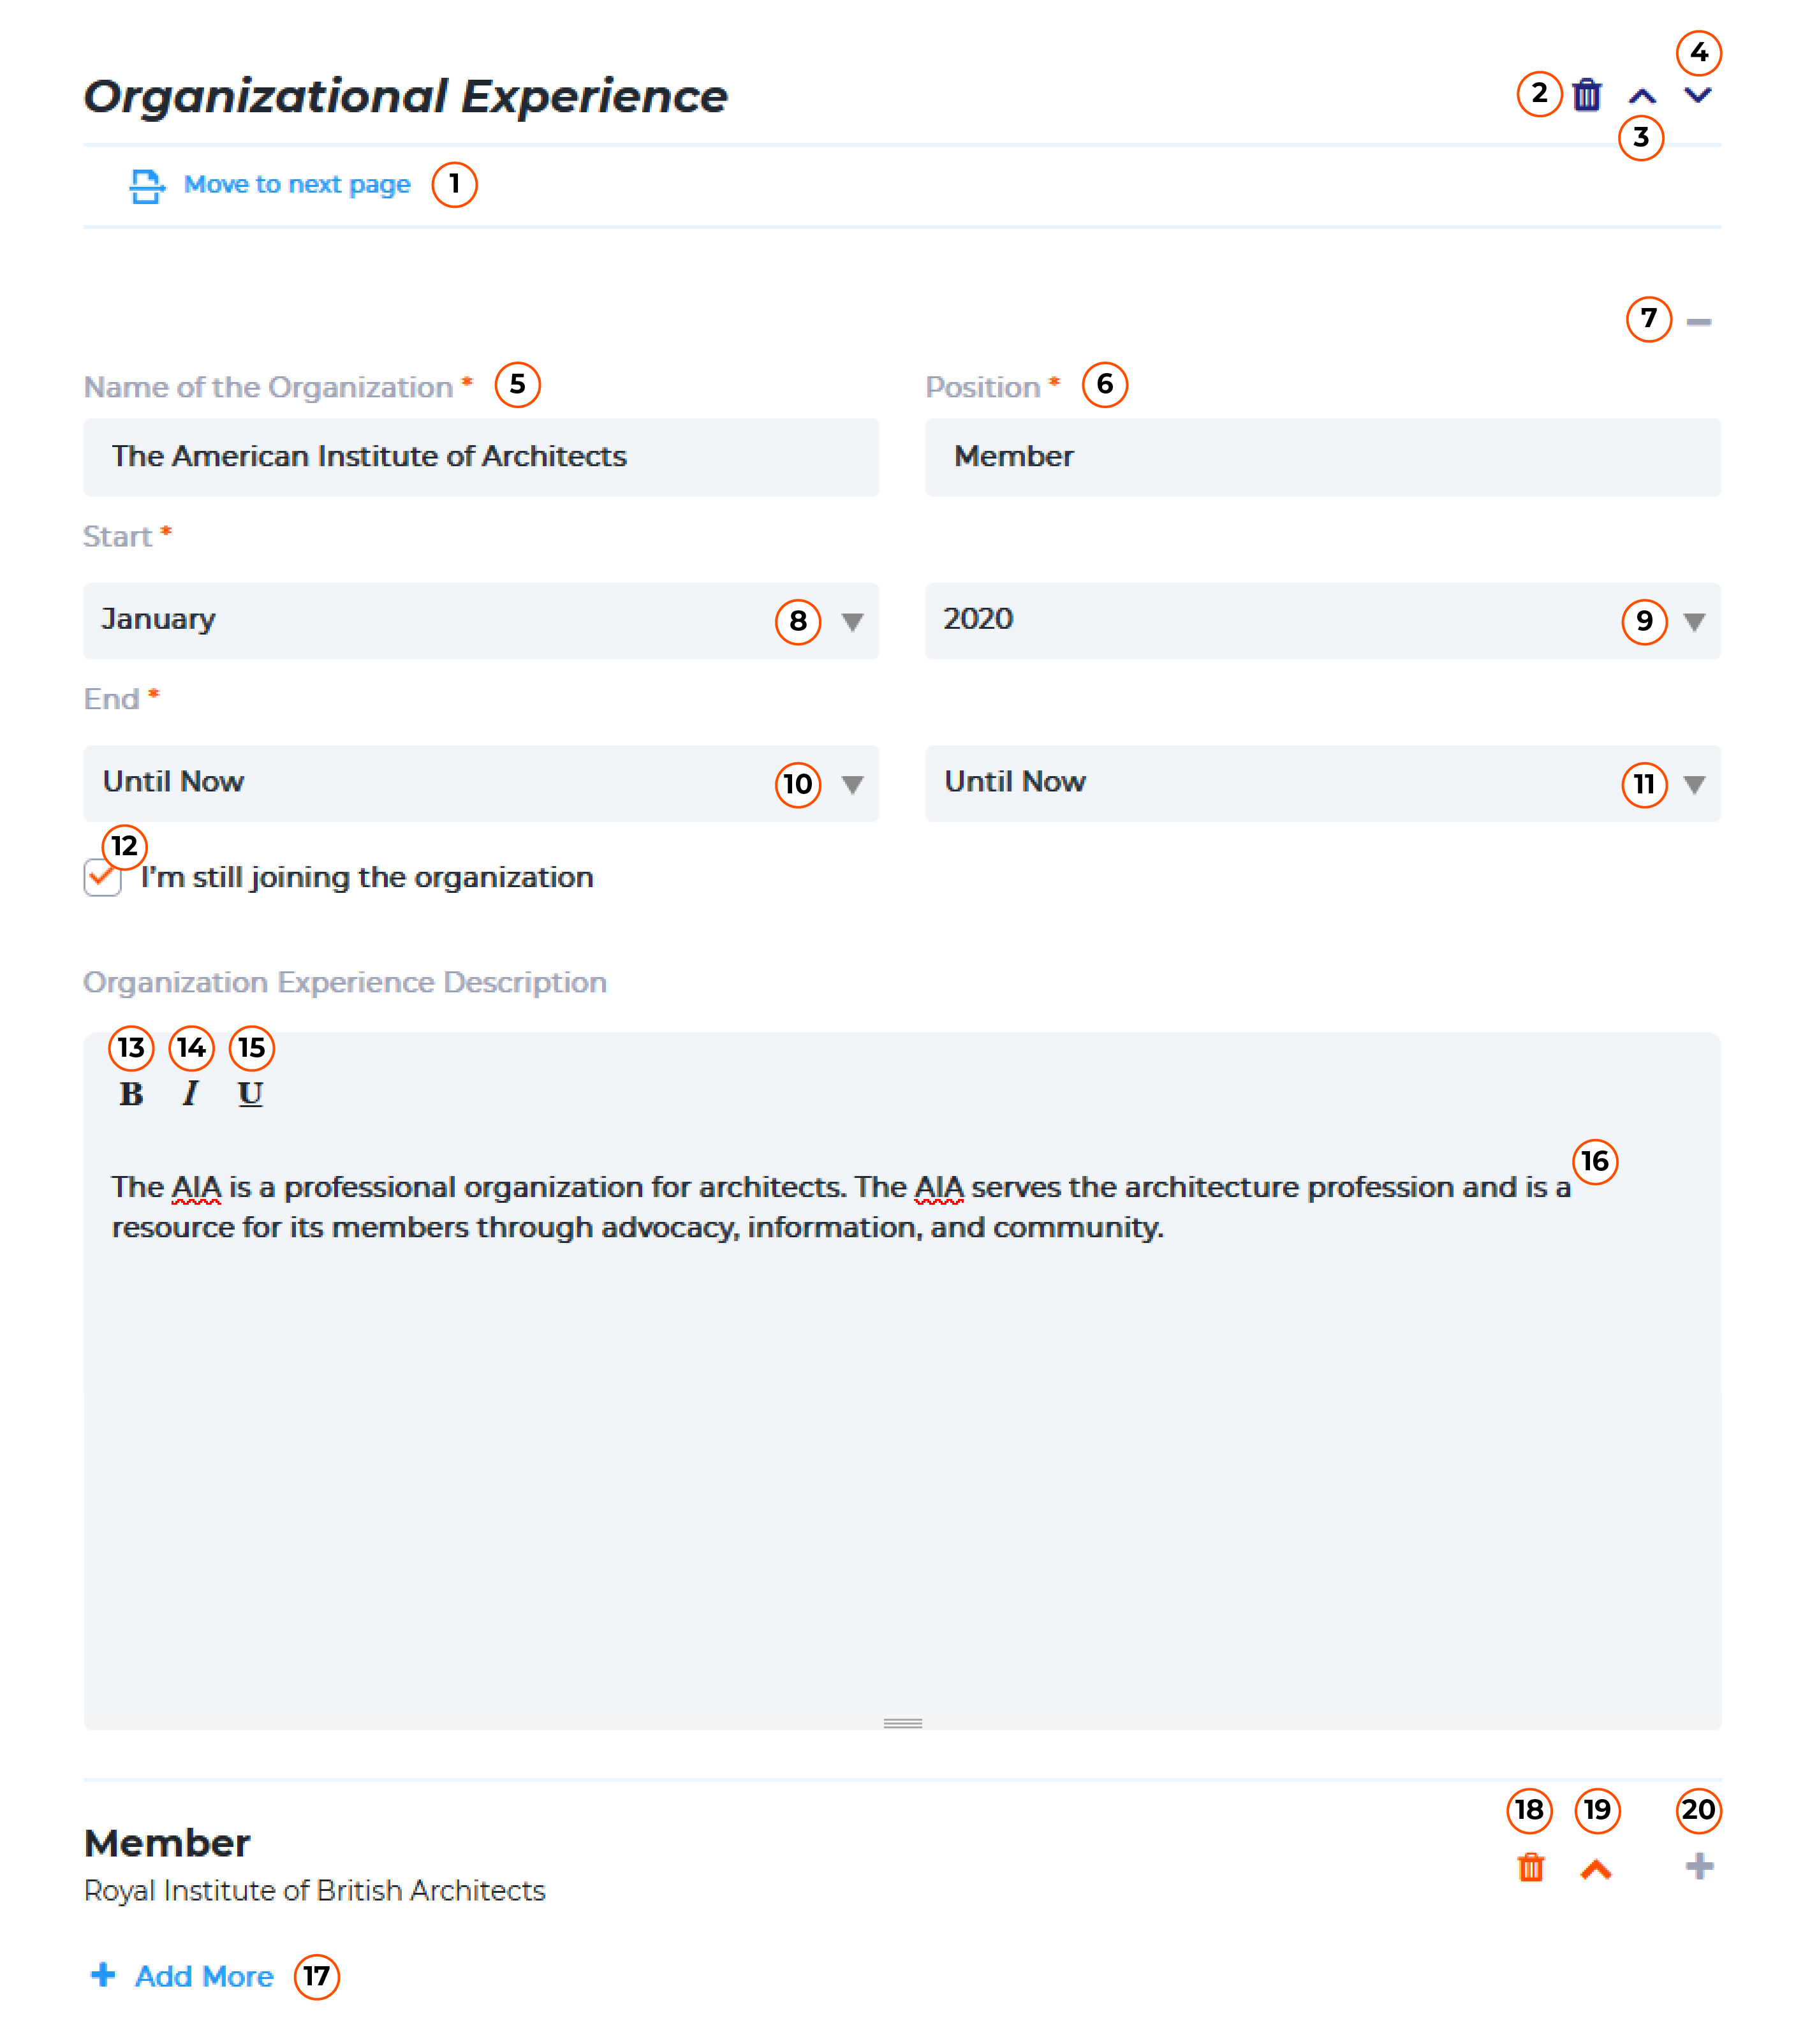
Just click the icon if you don’t want to write down “Organization Experiences” to your CV. You can go back to “Organization Experiences” form through a button “Show Deleted Form” below.
Silahkan klik ikon ini, jika anda ingin meletakkan posisi “Tentang Saya” dibagian bawah form lainnya.
Just click the icon if you want to put a position “Organization Experiences” in the below section.
Just click the icon if you want to put a position “Organization Experiences” in the next page of your CV.
Write down the name of the organization you have joined.
Write down the position/occupation you’ve joined in the organization.
Choose a month when you start in the organization.
Choose a year when you start in the organization.
Choose a month when you finish or stop working in the organization.
Choose a year when you finish or stop working in the organization.
If you’re still active in the organization, just tick this section.
Just click “Add More” if you have another organization you’ve been joining or had joined that’s relevant and want to put it in the CV.
Just click delete if you want to undo the Add More section of another organization.
After the form has been filled, just click “close”.
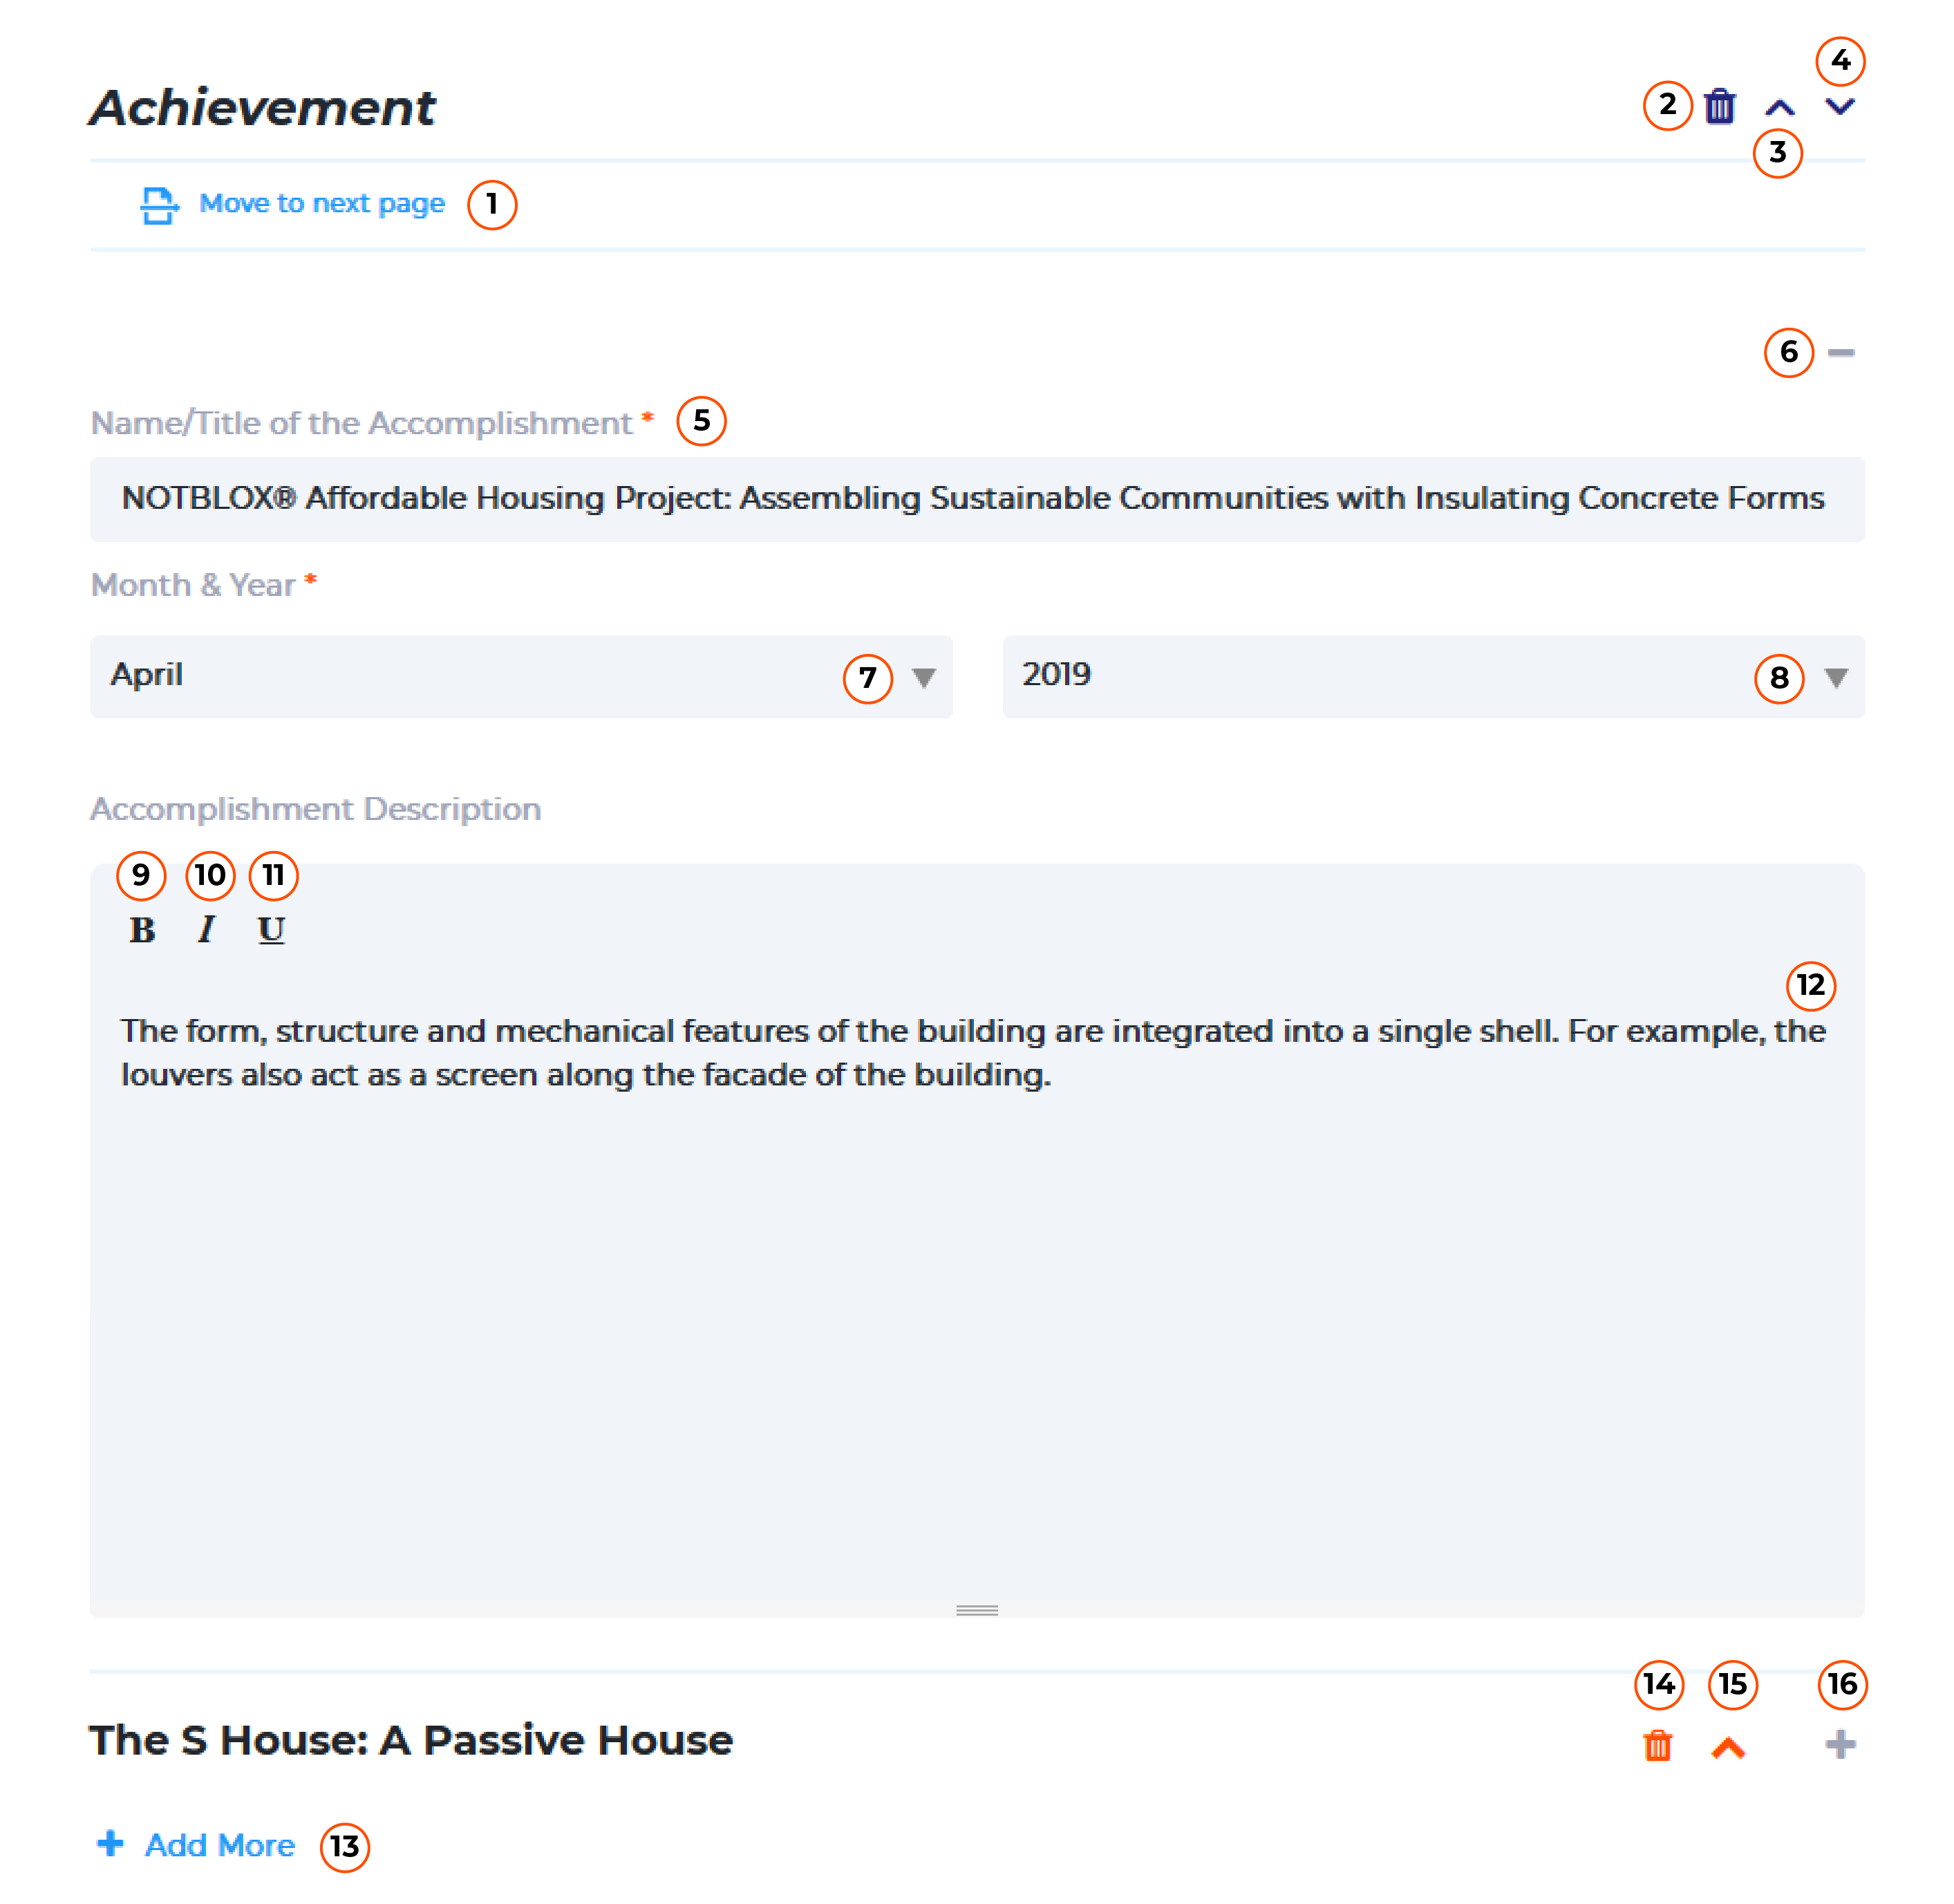
Just click this icon if you don’t want to write your “Accomplishment” in your CV. You can undo the form “Accomplishment” through a button “Show Deleted Form” below.
Just click the icon if you want to put a position “Accomplishment” above another form.
Just click the icon if you want to put a position “Accomplishment” under another form.
Just click the icon if you want to put a position “Accomplishment” in the next page of your CV.
Write down the title of your accomplishment here.
Write down the month when you get the accomplishment.
Write down the year when you get the accomplishment.
Just click “Add More” if you want to add another accomplishment that’s relevant and you want to show it in your CV.
After you’ve filled in the form, just click “close”
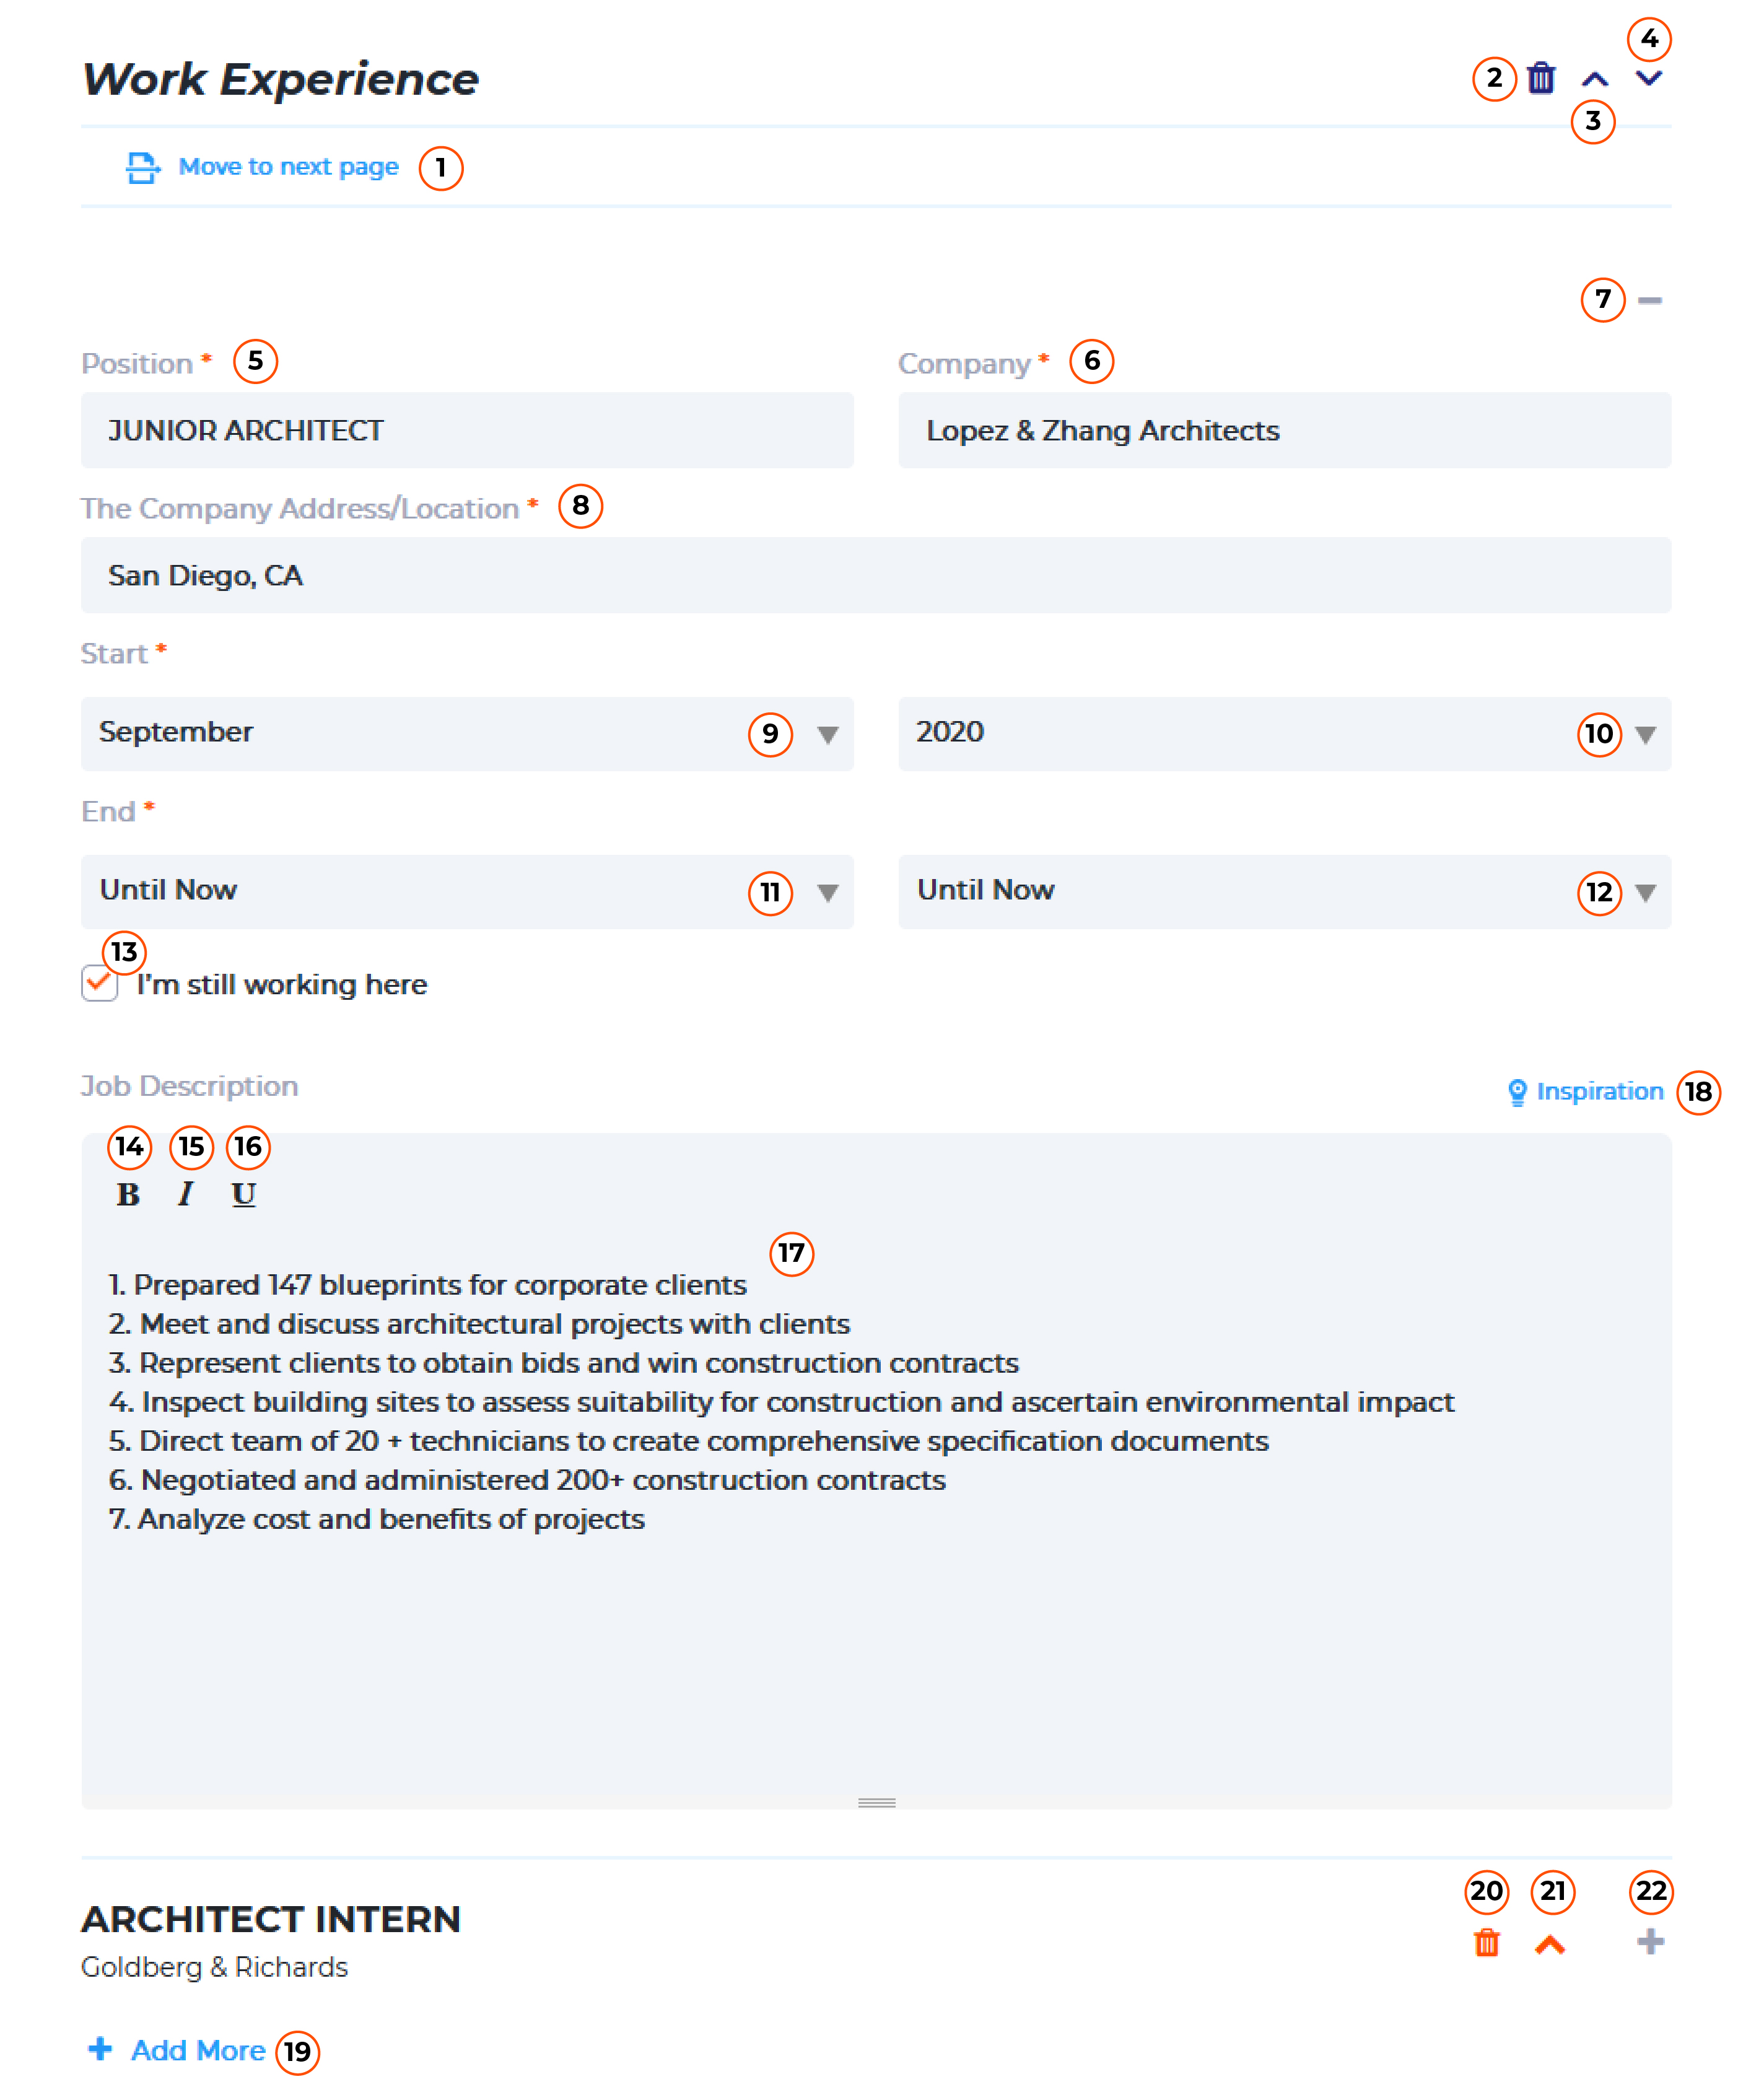
Just click the icon if you don’t want to write your “Job Experiences” in your CV. You can undo the form “Job Experiences” through the button “Show Deleted Form” below.
Just click the icon if you want to put a position “Job Experiences” above another form.
Just click the icon if you want to put a position “Job Experiences” below another form.
Just click the icon if you want to put a position “Job Experiences” in the next page of your CV.
Write down your position/occupation you’ve had before.
Write down the name of the company you worked for before.
Write down the location of the company you work for before.
Choose the month you started working in the company.
Choose the year you started working in the company.
Choose the month when you finish or stop working in the company.
Choose the year when you finish or stop working in the company.
If you’re still active or an employee in a company, just tick this section.
Just click the icon for seeing some inspiration that you can use in the “Job Experiences” form.
Just click the icon if you want your letter to be bold.
Just click the icon if you want your letter to be oblique.
Just click the icon if you want your letter to be underlined.
Write it down in clear and short description in this form, make your recruiter to be interested in your job description.
Just click the icon “Add More” if you want to show and want your other relevant job experiences to be put in the CV.
After the form is filled, you can click “close”.

Just click the icon if you don’t want to write your “Hobby” in your CV. You can undo the form “Hobby” through the button “Show Deleted Form” in the section below.
Just click the icon if you want to put a position of your “hobby” in the above section.
Just click the icon if you want to put a position of your “hobby” in the below section.
Just click the icon if you want to put a position of your “hobby” in the next page in your CV.
Write down your relevant hobby to the job you are applying.
Just click “Add More” if you want to have another relevant hobby to be put in the CV.
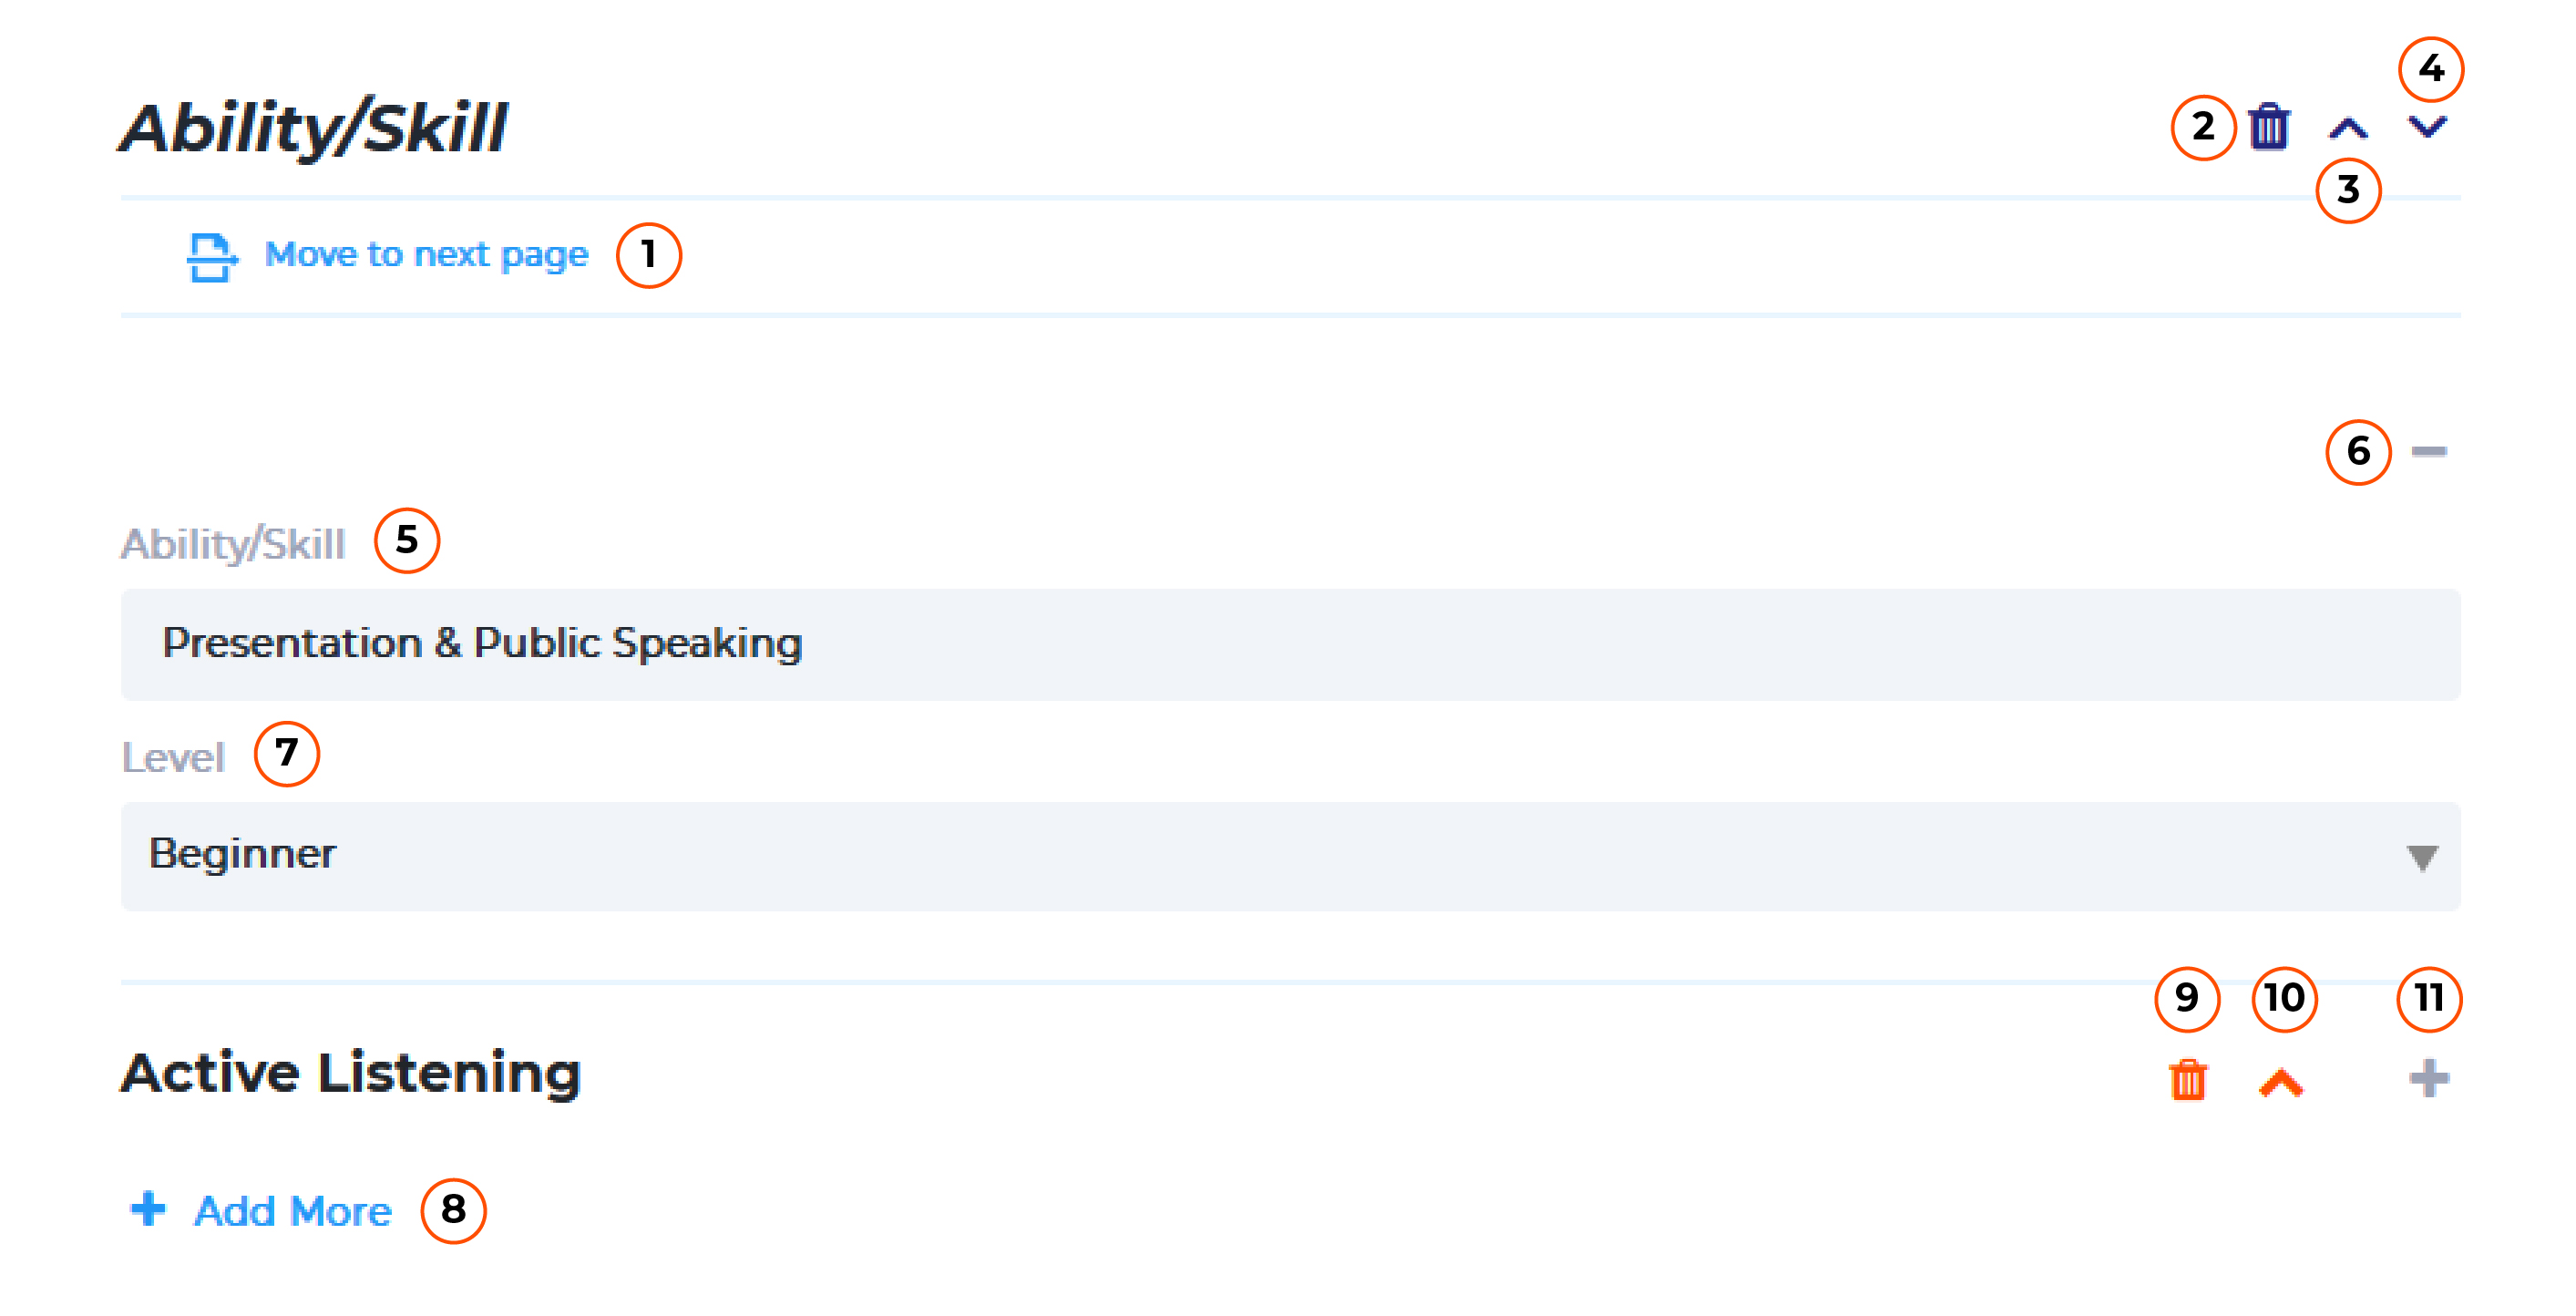
Just click the icon if you don’t want to write down your “Skill” in your CV. You can undo the form “Skill” through the button “Show Deleted Form” in the below section.
Just click the icon if you want to put “Skill” in another above section.
Just click the icon if you want to put “Skill” in another below section.
Just click the icon if you want to put “Skill” in the next page of your CV.
Write down your relevant skill to the job you’re applying for.
Choose the level that is aligned with your skill written above.
Just click the delete button if you don’t want to add another skill.
Just click “Add More” if you have and want your another relevant skill to be put in the CV.
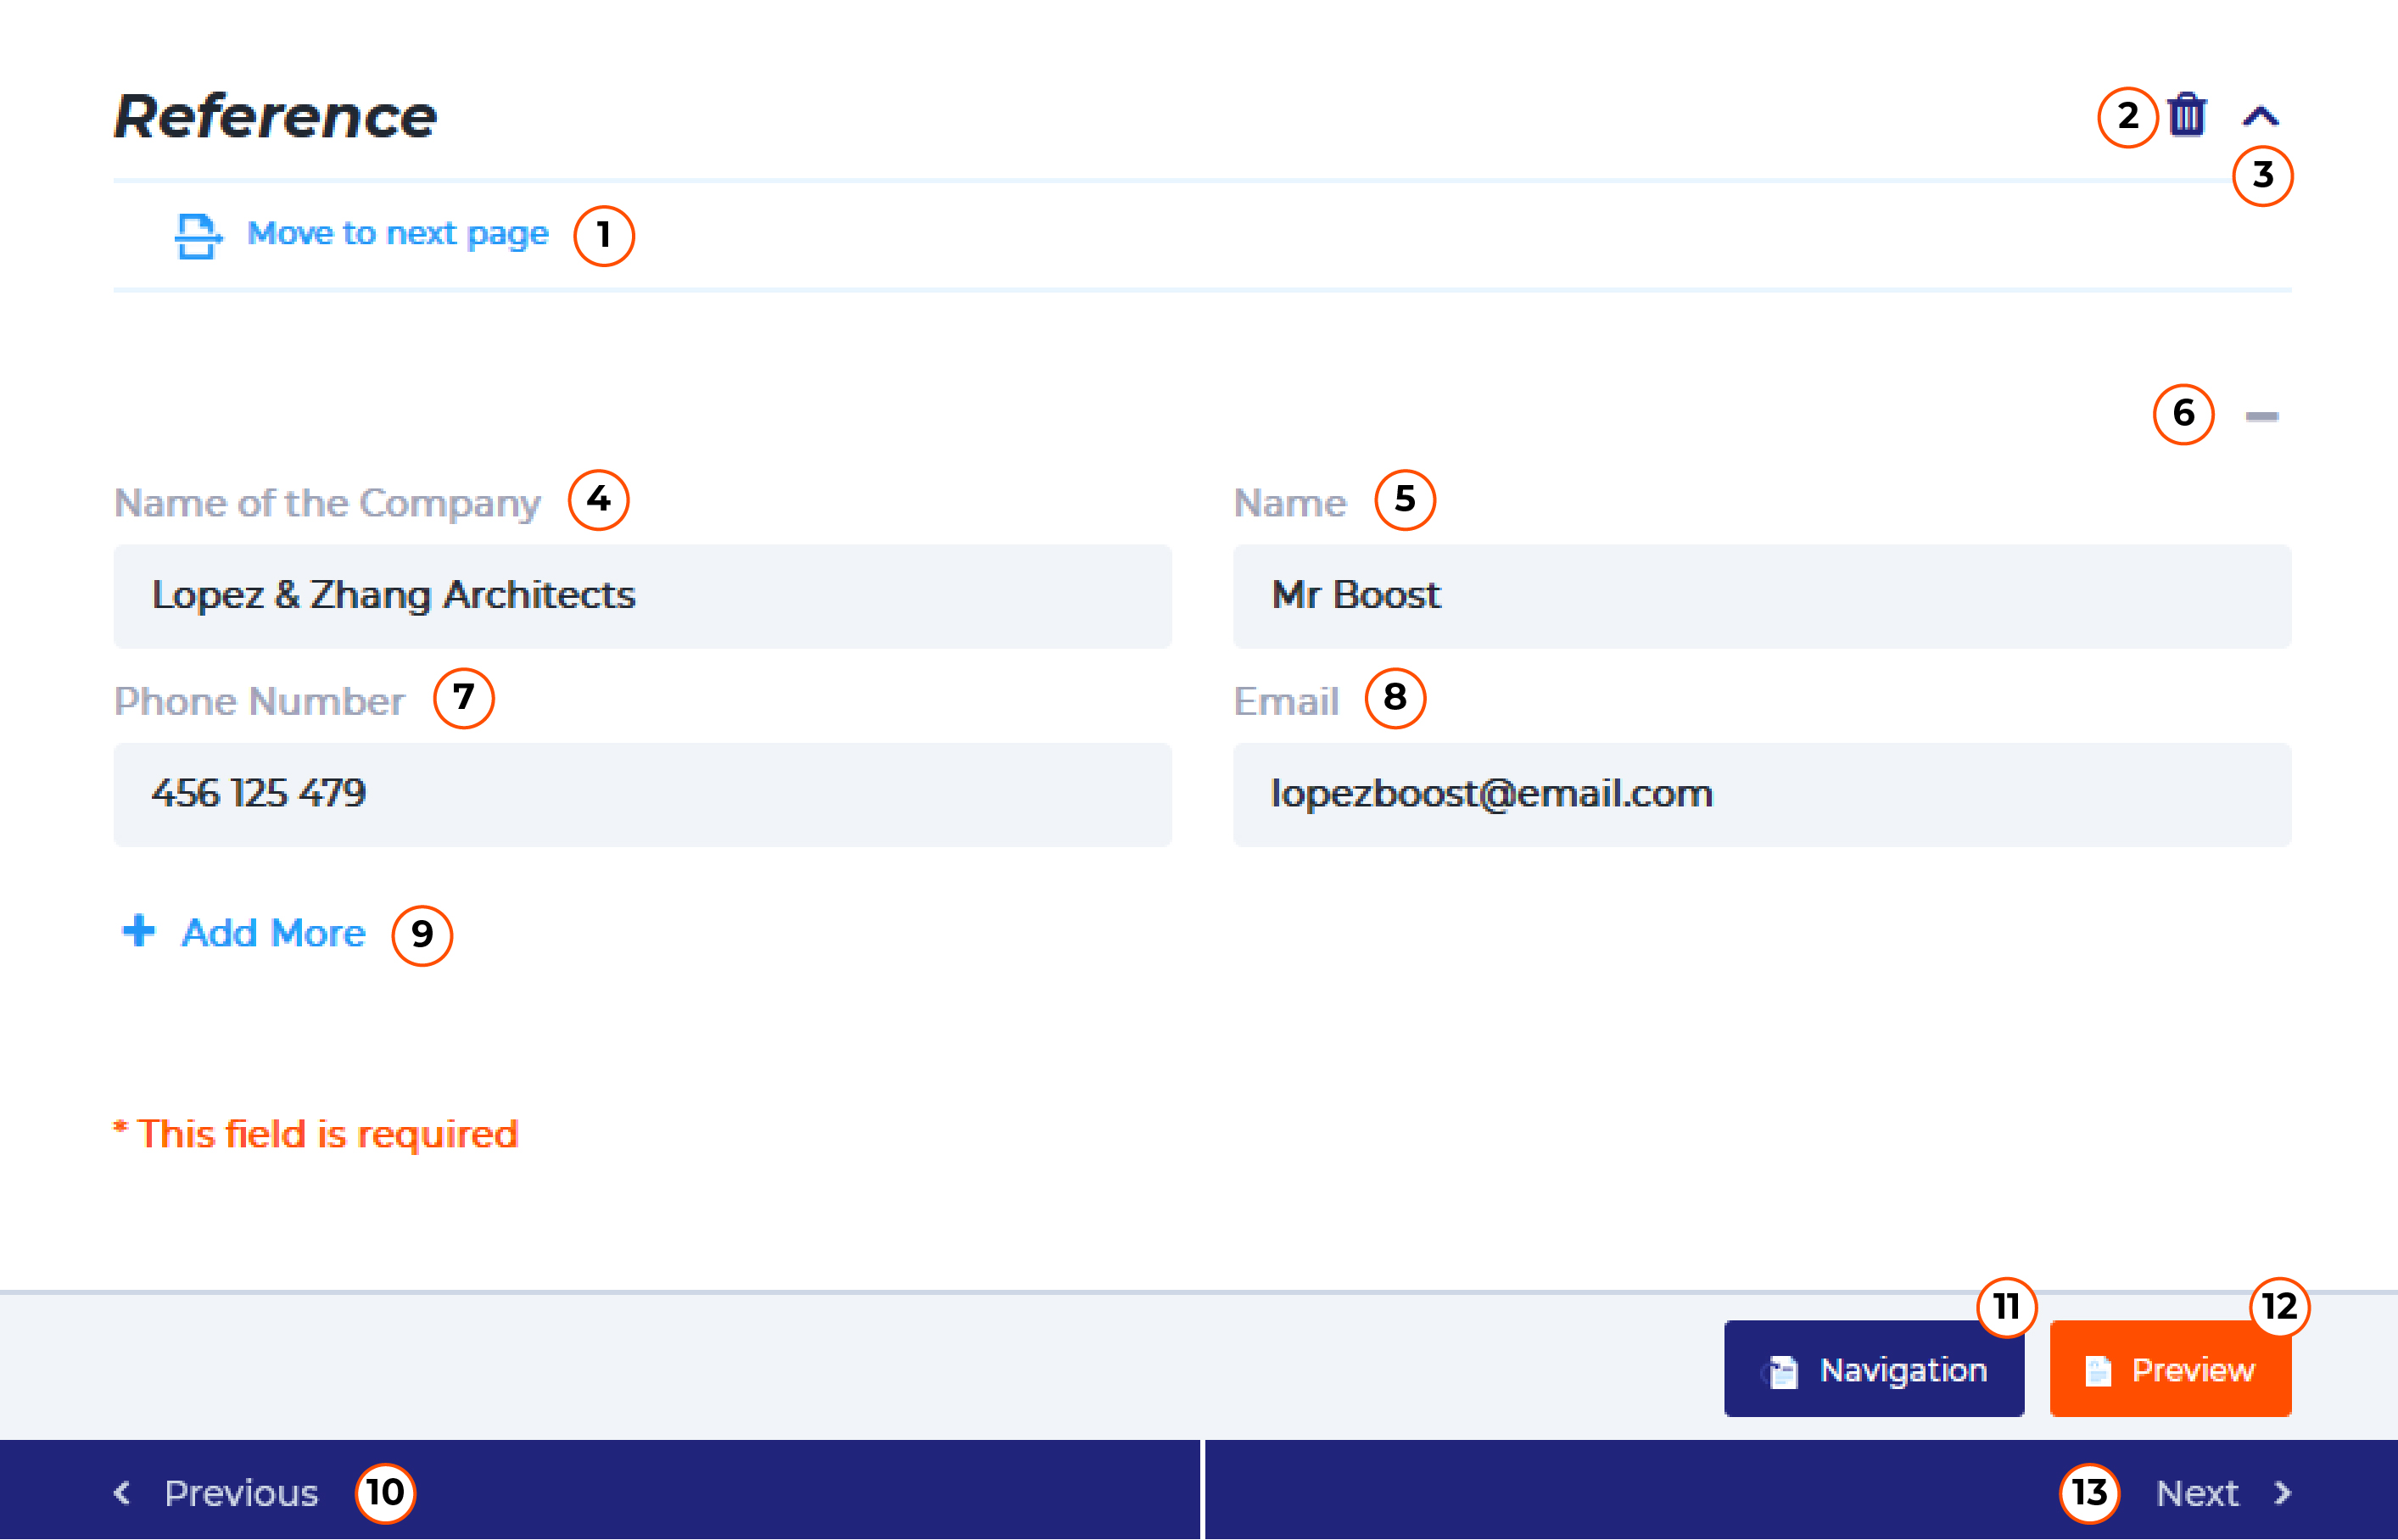
Just click the icon if you don’t want to write down “Reference” in your CV. You can undo the form “Reference” through the button “Show Deleted Form” in the below section.
Just click the icon if you want to put the position of your “Reference” in the above section.
Just click the icon if you want to put the position of your “Reference” in the next page of your CV.
Write down the name of the company to be your reference for applying in the new company
Write down the name of a person who is going to give the reference of your work to the new company.
Write down the number of a person who is going to give the reference of your work at the new company.
Write down the email of a person or the company who is going to give the reference of your work to the new company.
Just click “Add More” if there is another name of a person or the company that can give reference of your work to the new company.
Just click the button if you want to activate the form you’ve deleted through the trash icon.
You can see the preview of your CV through clicking the button “Preview”
Just click the previous button if you want to go back to the previous page.
Just click the next button if you want to go to the next page.
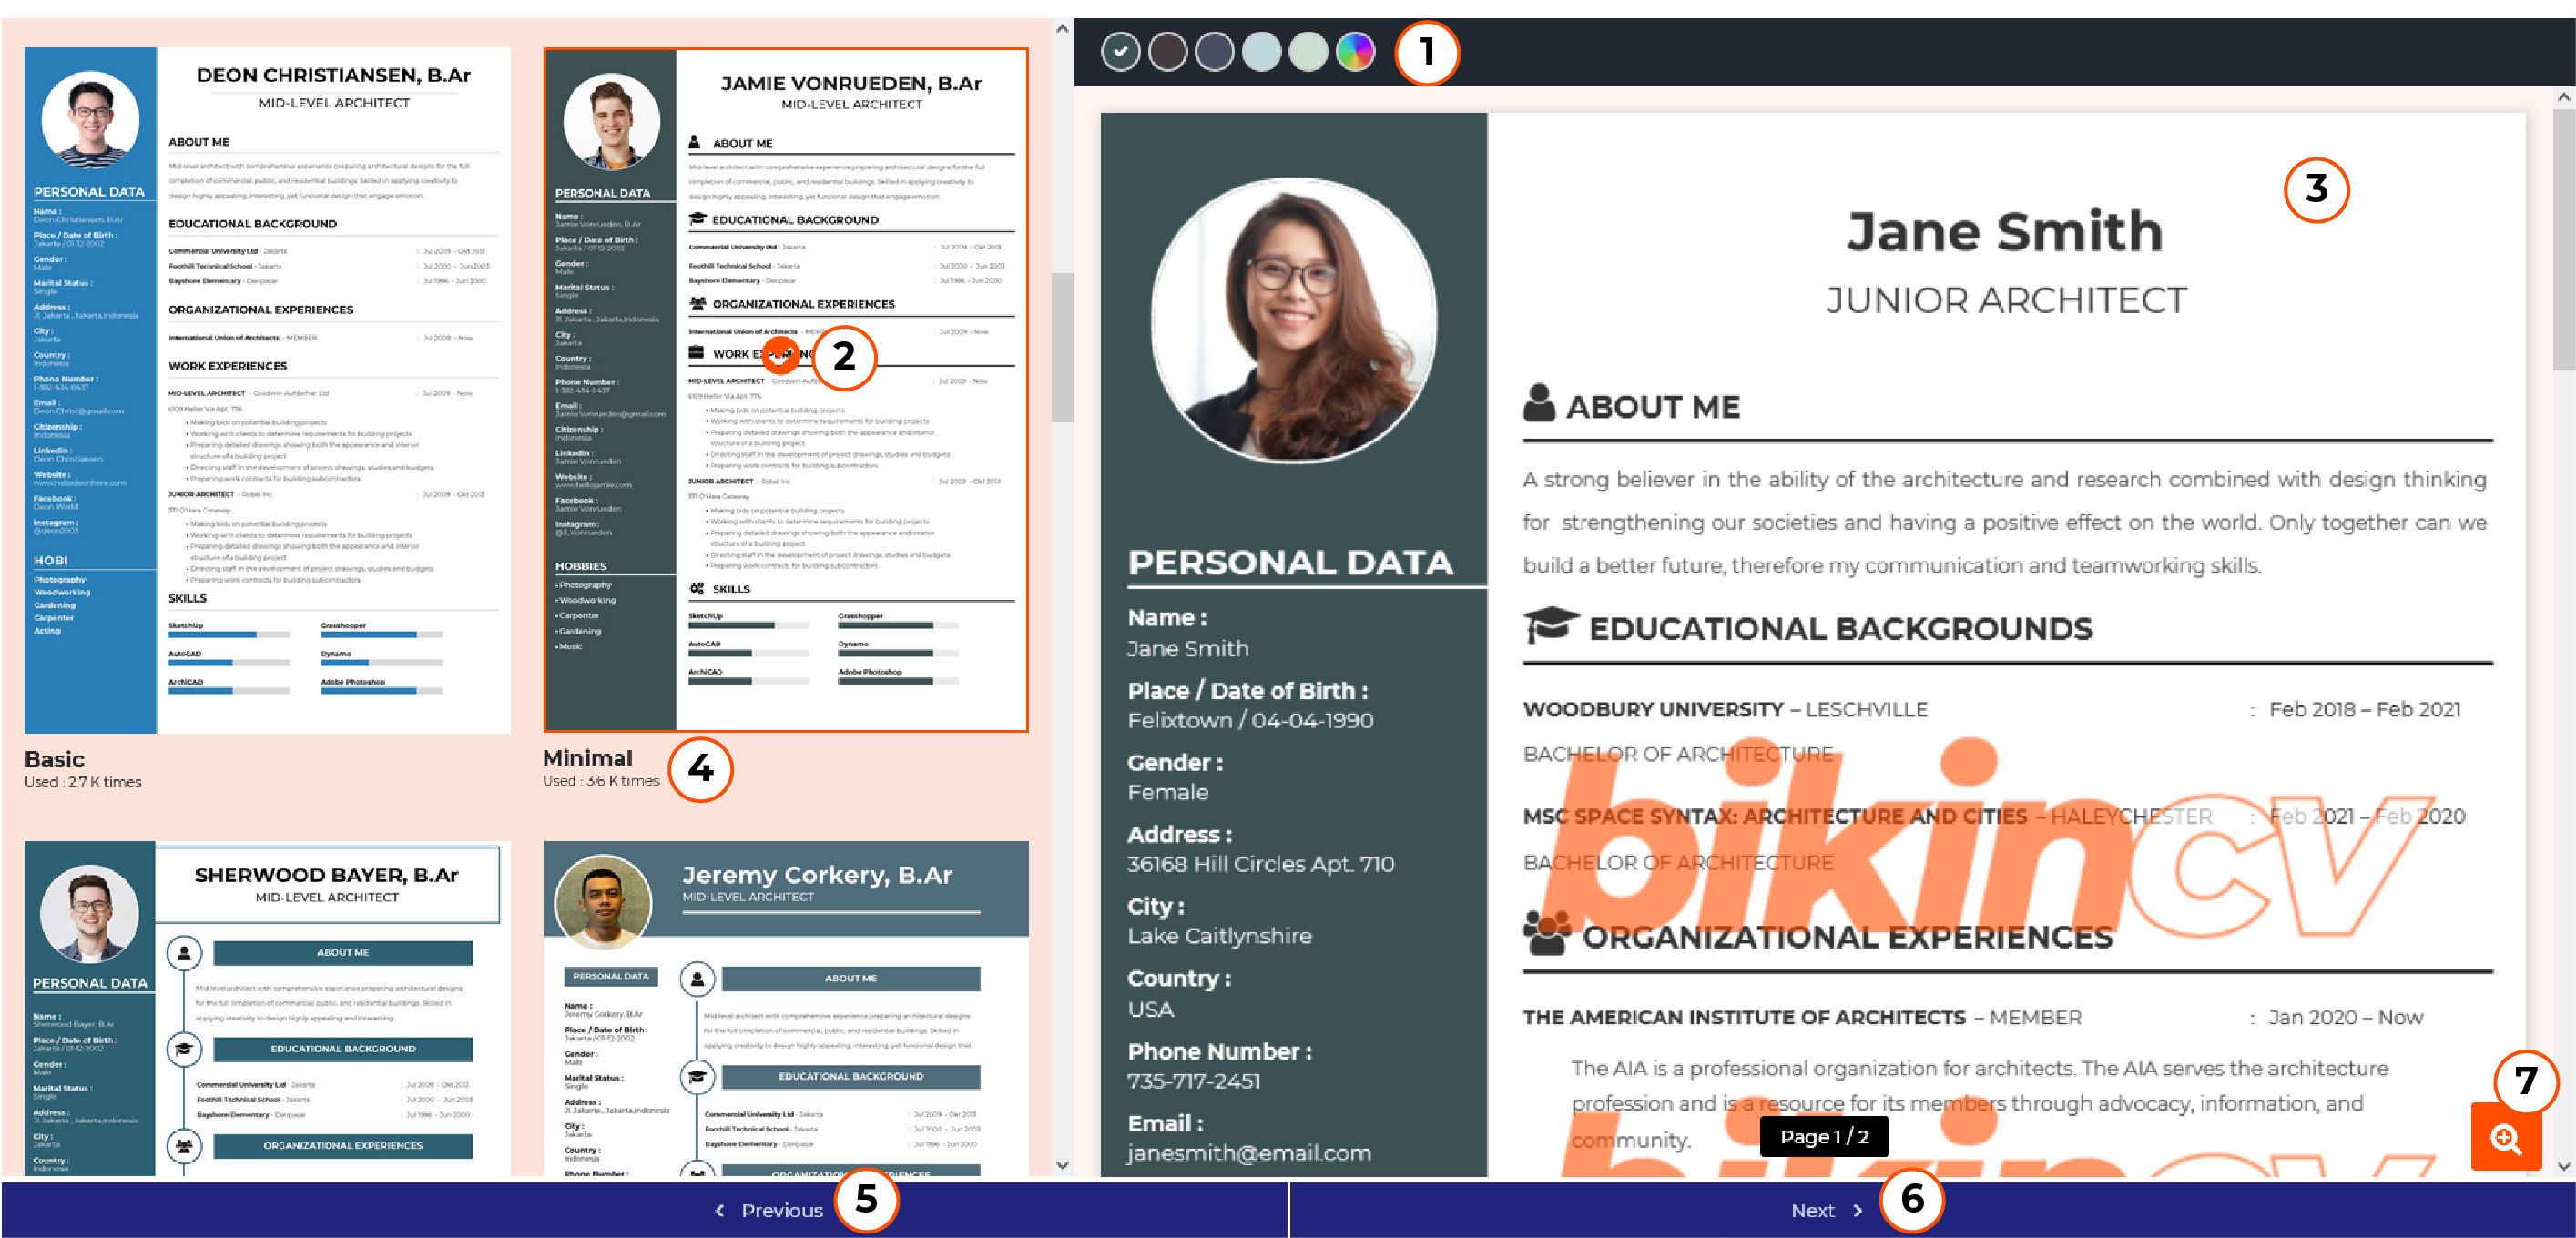
This is the default color you can choose, beside another color custom for your CV. You can choose any color you like by clicking the color round on the right.
This means that you have chosen the template design.
This is a preview from the CV layout that you just made.
This is the name of the template you choose and the price of the template.
Just click this to preview your CV entirely.
Just click this button if you want to go back to the previous page.
Just click this button if you want to go to the next page.